Develop A Woo-commerce Pizza Restaurant

Hi, I am Dinesh. I am a Full-Stack Developer and a tech-enthusiast. I believe sharing knowledge and personal experiences is a unique duty of human-being. I am also interested in other aspects such as spirituality, space, health, personal finance, nature, physiology, and human and animal behavior.
check my blog at https://www.tecforfun.com/
What is WooCommerce?
WooCommerce is a plugin that you can use to convert your WordPress Website into a powerful e-commerce site. You can create highly customized e-commerce websites with WooCommerce if you know how to work around it. While coding can benefit you to customize your site, non-technical individuals can also modify WooCommerce stores with a vast number of plugins available in WordPress. In this article, my primary focus is to help beginners in WooCommerce to develop a simple eCommerce site for simple products. I assume that you are already familiar with installing and setting up WordPress in your Localhost or web host and with the WordPress dashboard.
The main benefits of WooCommerce over other e-commerce platforms such as Shopify are low upfront fees in setting up a store and high customization.
Setting up WooCommerce store
First, go to Plugin in the WordPress Dashboard.
Plugins -> Add New, search for the plugin WooCommerce and click on Install Now button

Once the plugin is installed, click on Activate.

When you click on Activate, it will create four pages,
- Shop
- My account
- Cart
- Check out
Now Click on WooCommerce -> Home. You will get this wizard.
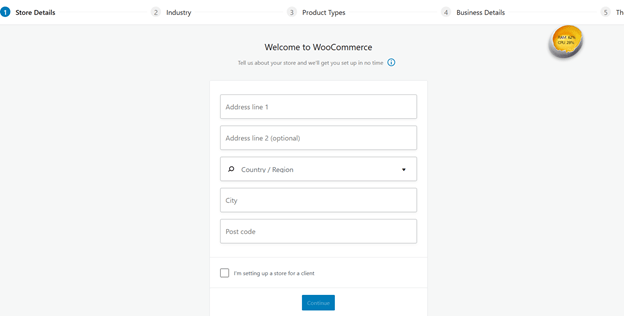
Enter the address of your store.
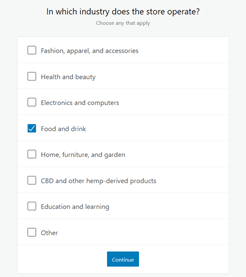
Since I focus this article on developers and non-techies setting up their own store, you can click on I am setting up a store for a client. Then, you can choose the industry that the client is involved. Let’s say Food and Drink for this example.
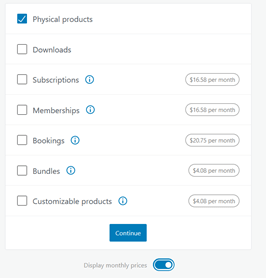
In the next screen, leave the default settings as it is.
The next screen will ask you to set up Business details, click on “I don’t have any products yet”. We are going to add products later. And for the next drop-down menu (“Currently selling elsewhere?”), Click on “No”. click on continue This will prompt you to the “Free Feature” tab on the same page. Keep the default settings as it is and click on continue. Now, you can choose a theme on the next screen.
There are paid and free themes. StoreFront is a free WooCommerce recommended theme. Let’s choose that. You can select a different theme if you wish after the set-up as well.
After you choose the theme click on continue with my active theme. Then you will be prompt to the following screen.

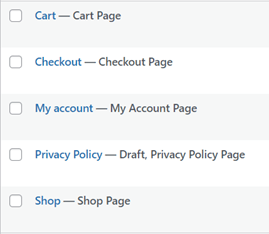
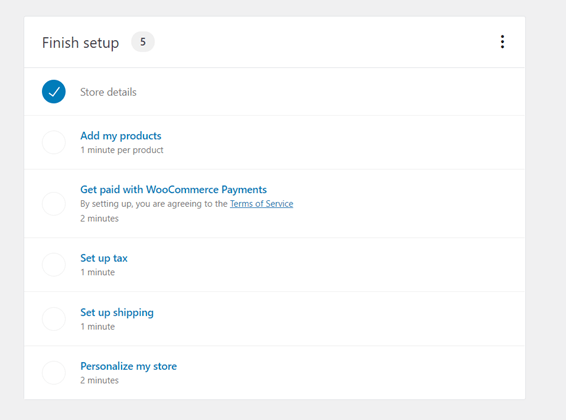
Now, We can add products, add payment methods, set up tax, set up shipping, and personalize your store. But, before we go further you can check how many pages are automatically created by WooCommerce. Click on pages on the Dashboard. Note, there are five pages.
Create product category
Now, it is time to add products. However, before we add any products weekend calculates the products into categories. for example, if you have a small pizza restaurant you may have pizza answer category soda as a category and ND chicken wings as category etc. therefore, we will add pizza as a category.
Create product categories click on products and go to categories.
Products -> Categories
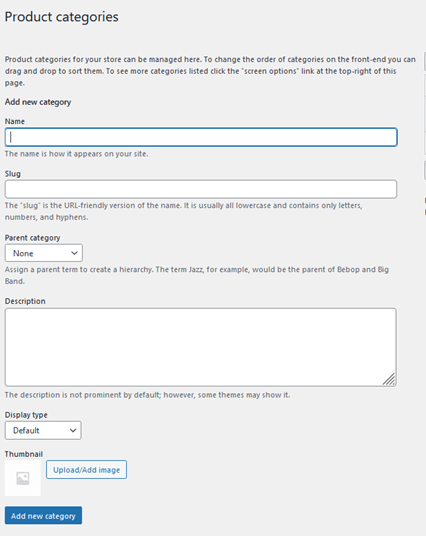
For the new category, add the following data
Name: pizza
Slug: pizza
Parent Category: None
Display Type: Products
Leave the Description blank and you do not need to add any Image. Now Click on Add new category.
Add new products
To add products, Click on WooCommerce -> Home. You will see the previous screen that we saw earlier
Click on Add my products. Now you will come to the following screen.
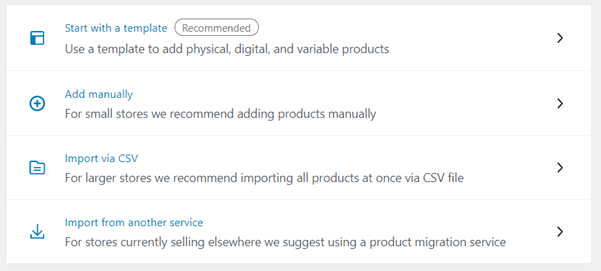
In our store, we have only four products. Therefore, we are going to click on Add manually option.
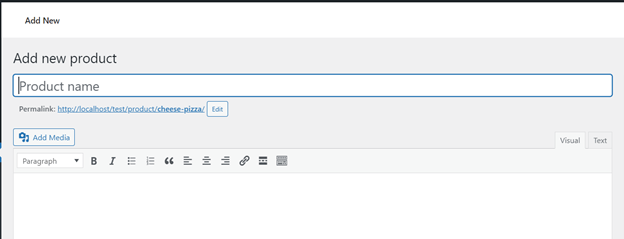
This is where you add your products to the store. You can also come to this screen by clicking on
Products in the dashboard and then Add New menu option.
Imagine we have a pizza store that sells four kinds of pizza. These are four products.
- Cheese pizza
- Sausage pizza
- Pepperoni pizza
- veggie pizza
Therefore, for cheese pizza
Product name: Cheese pizza
Now, click on Set Product Image on the Product Image palette.
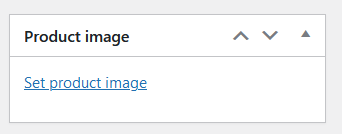
Make sure to give an Alt text for your image(for example “cheese pizza”). Leave other settings as it is and click on Set product image button.
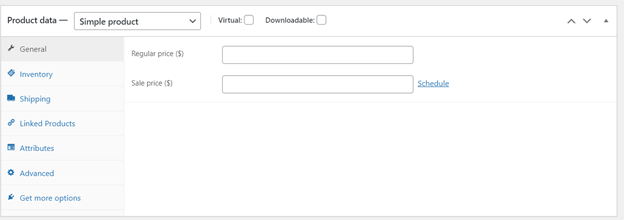
Once you set the image scroll down and come to the Product data section on the Products page.
WooCommerce has four kinds of products.
- Simple product
- Grouped product
- External/Affiliate products
- Variable products
More on WooCommerce products (for now, later may change to an internal link)
For our Store select Simple product.
Now set a price for the product. Let us say a cheese pizza is $8.
Enter $ 8 for the Regular price($) and leave the Sale price blank (do not enter anything). In the sidebar, under Product categories, select pizza as the category. Now, click on publish button in the top left of the products page.
Now, you can do add three other products the same way:
- Sausage pizza
- Pepperoni pizza
- veggie pizza
you can set relevant pictures for all those products. For veggie pizza, you can set the regular price as $8 and the sale price to $6.
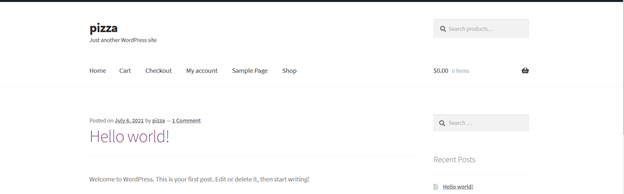
After you add all the products, click on the name of the store at the top corner of the Dashboard, and visit the site.
Now, We are going to add some changes to the existing Hompage.
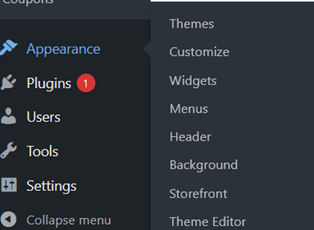
First We will modify the name of the site. Let’s say the name of our demo restaurant is pizzaMania. You can do this by clicking on Appearance in the dashboard and Customize in the sub-menu.
Then, click on Site Identity. Enter pizzaMania for Site Title and Your pizza restaurant for Tagline. Then click on Publish button.
Customize the primary menu
Now, we need to change the primary menu, go back to the dashboard, and click on Appearance -> Menus.
Although WordPress creates a primary menu, based on to pages you have, we do not depend on it as it has unnecessary menu items for the website. Our simple restaurant had only three pages.
- Shop
- Cart
- Check out
So, this is our primary menu. Now, we are going to create it.
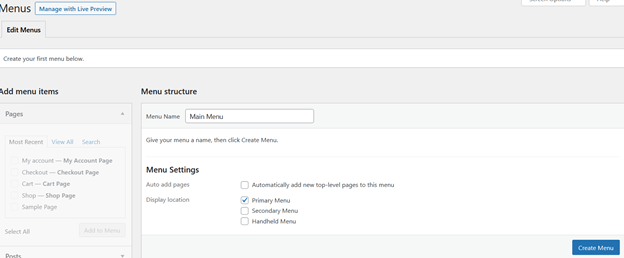
Enter Main Menu as the name of the primary menu.
In Menu Settings, check the primary Menu check box. Then, click on Create Menu button. Now, the Menus screen will change as below. It’s time to add menu items for the newly created primary menu. Checkmark on Shop Page, Cart Page, and Checkout Page, and click on Add to Menu button.
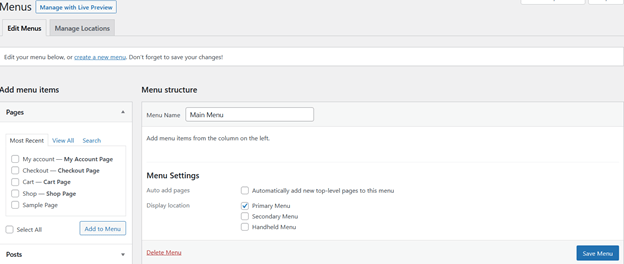
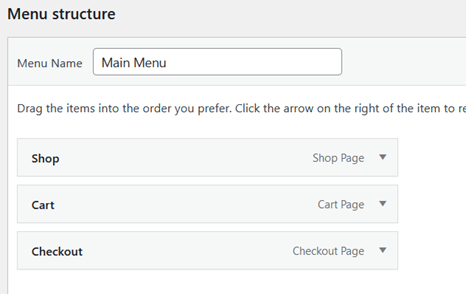
Rearrange the menu items so that it appears as in the below screen. After that click on Save Menu button.
Visit your site and check the header area. It should appear like this:

Set up customized Homepage
Now, we are going to add a customized Homepage(landing page) for our restaurant. Go back to the dashboard and click on Pages. We are going to create a new page for our Homepage. So, click on Add New. We are going to make an extremely simple landing page(as this is not our focus in this article).
Add a heading and make it H1. Then make it center align. After that, add an Image and set it to Wide width or Full width. You are free to make any changes you want to make your homepage attractive. Then, click on Publish button. After publishing it, go back to the Dashboard. You will see that we did not give our home page a title. So, it will appear as (no title). Now, click on Appearance -> Customize.
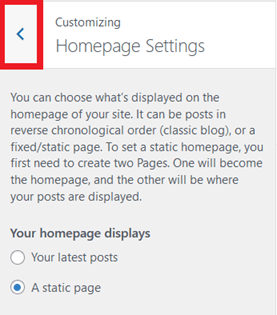
We are going to change Homepage Settings. Click on Homepage Settings. The WordPress default setting for homepages is to display the latest blog post. We are going to change this to a static page. Therefore, select a static page and set the Homepage to the newly created page #number(no title). Do not worry about the number here. It is the page id WordPress Created. Select it and set it as the Homepage. You will notice the Homepage is changing to the newly created page. Now, we are going to remove the sidebar from our website. Click on the back arrow of the Homepage Settings.
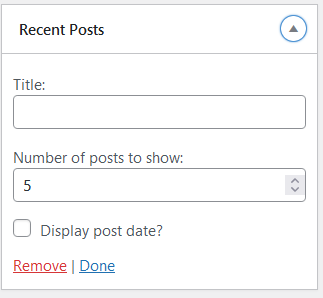
Then, select Widgets -> Sidebar. In the Sidebar, there are six Widgets. We are going to remove them. Click on each widget and click on Remove. For example, this is the Recent Posts widget. You will notice as you click on Remove, the relevant widget is disappearing. After you remove all the widgets, the homepage image will resize to Full width or Wide width depending on the changes you made earlier when creating the Homepage. After you have removed all the widgets, make sure to click on Publish button to make those changes you made permanent.
Set Checkout page
I will show in this section how to configure the checkout page. First, we need to know about the SSL certificate. If you run on your WordPress on localhost, most probably, you do not have an SSL certificate. Your localhost is on HTTP protocol and not on secure HTTPS.
This makes it impossible to configure WooCommerce Payments. When we set up our store WooCommerce, by default, install the WooCommerce Payments plugin. This plugin is important if you have a live site with a web host. However, on localhost, this plugin prevents you from setting up payments method because there is no SSL certificate.
You can check more on SSL and HTTPS here.
If the WooCommerce Payments plugin is installed, you will see the following screen when you click on Payments( you can also come to the same screen by WooCommerce-> Settings -> Payments).
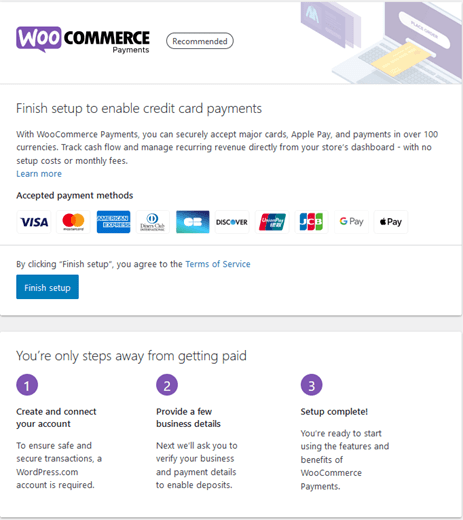
But when you click on Finish setup button you will notice the following error message.

As you might be doing this tutorial on localhost, to set up the checkout page, we will be going to deactivate the WooCommerce Payments.
First, deactivate the WooCommerce Payments plugin. Click on Plugins -> Installed Plugins -> Deactivate.
Now, Click on WooCommerce -> Settings -> Payments. There are four payment methods by default.
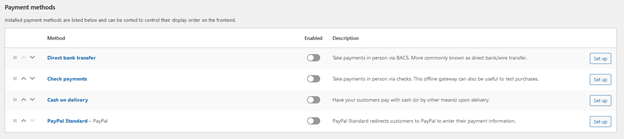
We will enable three methods:
- Direct bank transfer
- Cash on delivery
- PayPal Standard
Now, to set up a Direct bank transfer, click on Set up button. Here, you can give your banking information. So, when a customer places an order and proceeds to check out, the payments will be transferred to your banking account.
Setting up Cash on delivery is straightforward. You can provide appropriate instruction for customers
In Setting up PayPal Standard, you can provide your PayPal email and any description. If you are not a developer, keep the default settings as it is.
Once you enabled all the payments methods, test your site by placing an order. BUT do not place an order on the checkout page if you are on localhost. Because you do not have HTTPS and SSL for secure transactions.
Conclusion
WooCommere is a great plugin to set up your store for your specific needs. It is highly customized and has a low upfront cost to initiate. Once you are familiar with the WordPress Dashboard, give it a try on your Localhost or on your Web host.


