How To Create A Shop Page With Woo-commerce Blocks

Hi, I am Dinesh. I am a Full-Stack Developer and a tech-enthusiast. I believe sharing knowledge and personal experiences is a unique duty of human-being. I am also interested in other aspects such as spirituality, space, health, personal finance, nature, physiology, and human and animal behavior.
check my blog at https://www.tecforfun.com/
WooCommerce blocks
WooCommerce provides developers and store owners an easy to use building blocks in WordPress Gutenberg editors. You can use these blocks to create custom pages for your store.
Some of the blocks are
- All Products
- Product Search
- Filter Products by Price
In this post, I will show you how to create a custom shop page. I am using the Woocommerce storefront theme in this post for my store. You may use another theme. but, It should not hurt you much as many WordPress themes support WooCommerce.
To get the maximum out of this post, you need to know how to set up a WooCommerce store and WooCommerce categories. Product categories are similar to categories in WordPress. So, if you are familiar with WordPress categories, you can understand WooCommerce categories. If you do not know how to set up a WooCommerce store, please read this post first
Step 1: Remove the default shop page
When you set up a WooCommerce store, it creates a shop page by default. When you add products in WooCommerce, you will see these products on the shop page. We are going to put this default shop page to thrash in WordPress. Click on the checkmark next to the default shop page and click on thrash.

Step 2: Create a new page
Create a new page in WordPress and give it a meaningful name. As this page is going to be your new shop page, I gave the title “shop”( or any meaningful name such as store/my collection)
Step 3: Edit the new shop page
Now, it is time to covert this regular WordPress page into a shop page for our store.
What we are going to do here is to make a basic layout and utilize WooCommerce blocks to customize. The basic layout is this. It is similar to the default Layout of the WooCommerce storefront theme.

We are going to add building blocks to the Main Content area and the Sidebar. Often, the sidebar in the default theme has many unnecessary features such as archives and comments. etc. that may not so useful on the shop page. We are going to remove the default sidebar and create a custom sidebar. I will show that at the end of the post.
Create a basic layout
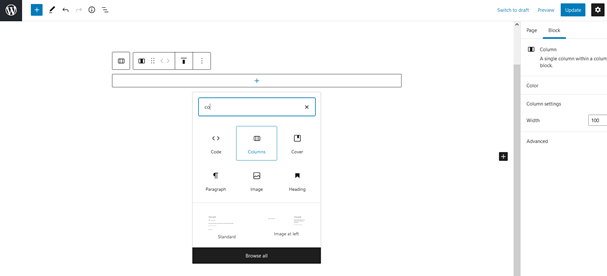
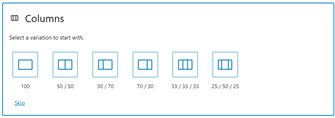
- Add a columns block to create the basic layout
- Choose 70/30 Layout
- Add the All Products block in the left section (Main area)
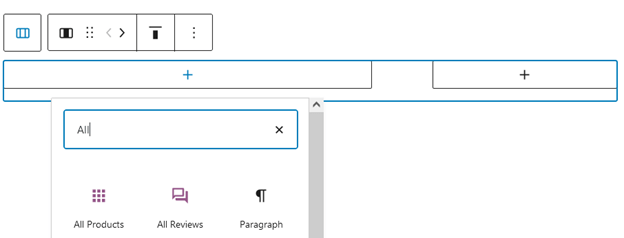
- All Products block has inner blocks that you can customize. Click on All Products block and then on Edit Icon.
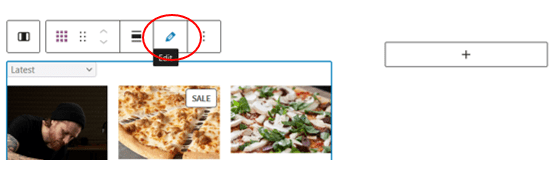
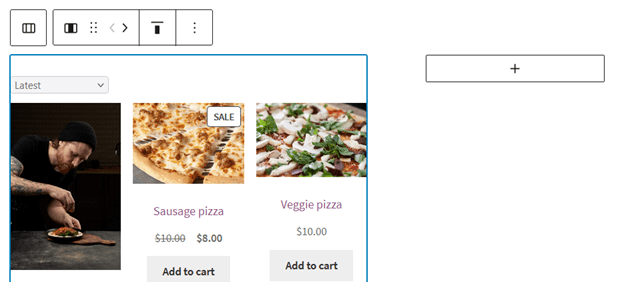
- After you clicked on the Edit Icon, All products block will change as below. This is a layout showing the inner blocks in All Products block. You can use it to customize the All Products block.
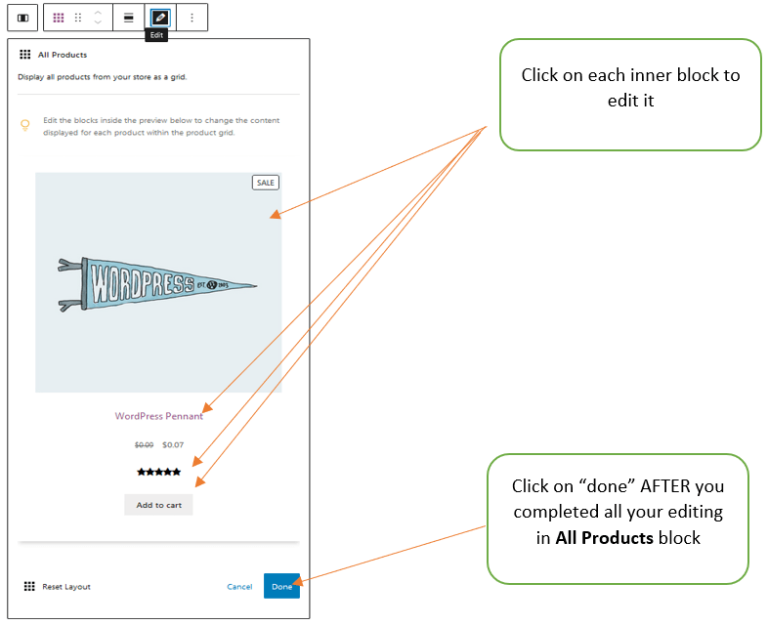
Edit All Products block
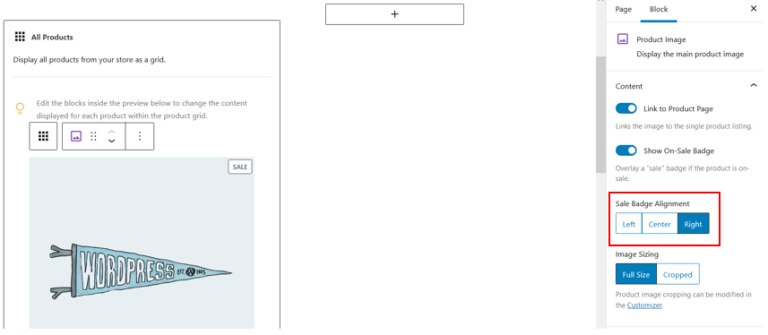
Use the panel on the right side of the WordPress editor to make changes.
For example, to change the inner block with the image so that the “sale badge” moves the left side of the image, click on the block with the image and use the right side editing panel on WordPress editor to align the “Sale-Badge”.
Add custom sidebar
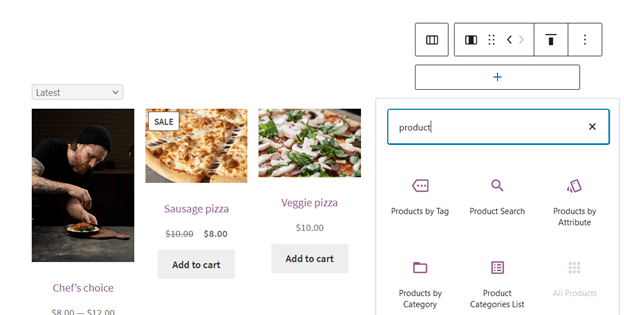
Now, in the right section of the basic layout, we are going to add some useful WooCommerce blocks
Click on the right section, type “product” in the search textbox, and click on Product Search. This will add a search bar on the sidebar
Likewise, you go ahead and add another block. Try to add Product Categories List block after Product Search block
Adding a filter block
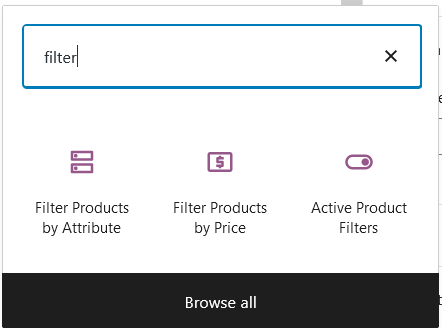
You can also add filters. We will add a Filter by Price block. Type “filter” in the search textbox and you can see a number of filters popup. Click on Filter Products by Price block.
After We add three blocks the sidebar should appear as below. This can be different in appearance depending on the categories you have in your store.
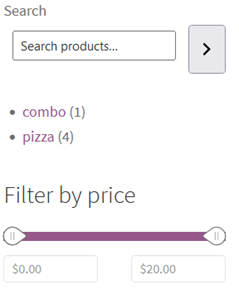
Note: Remember each of these inner blocks can be customized using the right-side panel of the WordPress editor.
After you have done all the changes make sure to preview the changes and if you are satisfied click on update. Your custom page should appear as below.
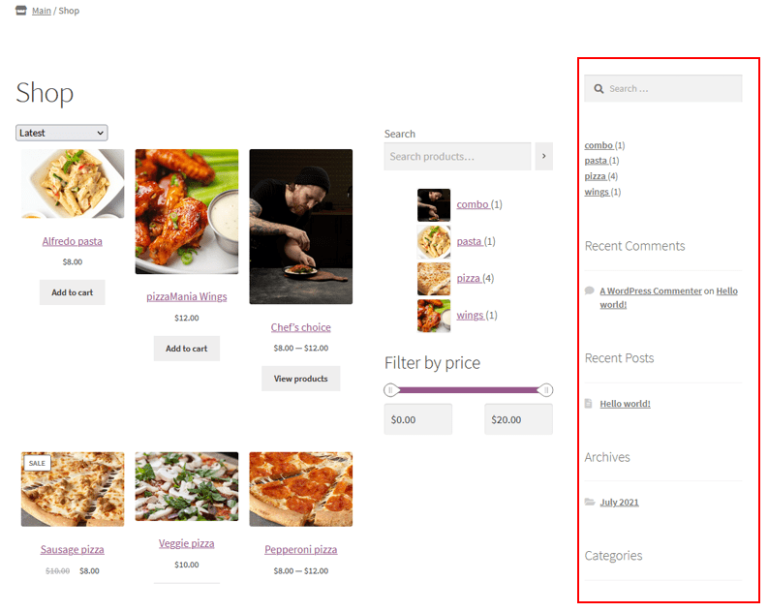
Oops, there is a problem…!
As you can see in the above image, the default sidebar is still there taking up the space of our custom shop page.
How can we get rid of this?
Removing the default sidebar from the shop page
The easiest way to do this is to change the template that the page use. Right now, our custom shop page is based on the default template of the storefront theme. Most of the WordPress themes come up with Full Width template that you can use.
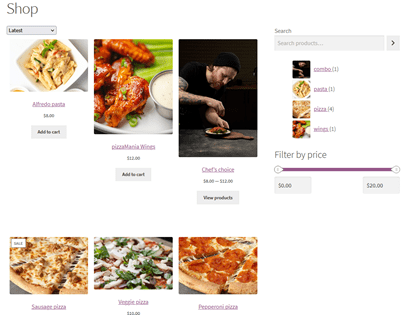
We are going to change the template the page use from the Default template to Full width.

Now, the shop page should appear as follows
What if you do not have a Full Width template
You can create a custom full-Width template. Let’s see how to do this.
Create a PHP file and name it as full-wdith.php(or any appropriate name) in your child-theme folder(If you are not familiar with child themes learn it here).
Add the following part at the beginning of the file
<?php
/*
*Template Name: Full Width Template.
*
*
*/

get_header();
?>
Then, find the page.php or single.php file in your themes folder(root folder). In my case it the storefront folder. It is in the wp-content> themes>storefront.
Open the page.php/single.php and copy the code from
<div id="primary" class="content-area">to the end of the file, and then paste it into the full-wdith.php in your child-theme folder/ directory.Now, remove the do_action( ‘storefront_sidebar’ ) from the code. This part can be little bit different from one theme to another. In your theme , it could be <?php get_sidebar(); ?>
Conclusion
WooCommerce building blocks are useful tools for both developers and non-techies to customize the store pages. You can learn more about Woocommerce blocks here. If you have further questions, you can ask me in the comment section. I will answer it, as time permits, as best I can.


